Those, who are using computer for more than a decade, know how it feels to work with a computer that does not have Windows Office. It is a software pack, manufactured by Microsoft, containing Word, Excel, PowerPoint, Outlook and some other components. Microsoft Word is specifically used for text document creation, editing and various other purposes. On the other hand, excel is used for creating financial spreadsheets, reports, balance sheets, etc. Even learning computer basics includes learning the in-depth us of these software or applications from Microsoft. So far, many other developers have designed their own versions of Word and Excel, but nothing seems to be as advanced as Microsoft’s products.
Google has recently brought up Google Docs, which is not exactly the replacement of Microsoft Word, but a viable option for web based document creating as well as editing. It can synchronize with Microsoft Word, and that is probably the biggest benefit of this cloud based application from Google. If you are a frequent Gmail user, you would be well accustomed with Google Docs. Whenever, you get MS Word file in attachment, you can open it directly on your mail attachment through Google Docs. Clicking on the attachment would open the read only version of the document. You can select to edit the file as well.
To edit MS Word Document with Google Docs, you need to open the attachment first. A single click on the attached file will do that. Take your mouse on the top right corner of Gmail, where you will get option for editing. Click on edit and you shall be taken to Google Doc interface, where you will be able to make modification on the document content. Now, handling Google Docs is truly easy, as most of its features are similar to Windows Word. Thus, if you are well accustomed with MS Word, you will find no problem whatsoever with Google Docs.
There are number of benefit of Google Gmail. People buy Old or New Gmail accounts for email marketing.
It’s hard to imagine a situation where an affiliate who works with Facebook doesn’t use a social network pixel. What is a pixel, why is it needed and how to set it up, we will tell in the article below.
What is Facebook Pixel
A pixel is a special code that collects information about visitors to a particular site and their actions on it. The Facebook pixel is used for both Facebook and Instagram. Its main task is to collect data with which you can further optimize advertising campaigns.
A pixel can be created in the Facebook ad account and then added to the site. If there is no site, then this tool will not be useful to you.
With the Facebook pixel, you can see for example:
– all site visitors over the past 180 days who have been on it for more than 15 seconds;
– user behavior on the site: which pages they visited, how much time they spent on a particular page, they bought your service or left the site without buying;
– which category of users was the most active; etc.
If you do not have an advertising account on Facebook yet, you can buy ready-made accounts with a connected advertising account in BulkLogin. In addition to bonuses in the form of resident proxies, browser anti-detection and account guarantees, you will receive round-the-clock support from our specialists who, in particular, will be able to help you with the Facebook pixel.
What is the Facebook pixel for
Setting up the target audience for displaying ads. Facebook is a great source of traffic, where you can find an audience that is right for your offer. However, a common problem for affiliates is to understand exactly who and what category of people is ready to perform targeted actions on the selected offer.
Based on the data collected using the pixel, you can create look-alike audiences, which will help you more accurately customize the audience for a specific offer. As a result, it will be possible to increase conversions while reducing advertising costs.
Conversion monitoring. By tracking the targeted actions that the user performed on the site, it will be possible to further offer him other goods and services. For example, if you see that a particular user has purchased a laptop on your site, it will be pointless to show him an advertisement for the same laptop again. But it will be possible to show related products in advertising: a mouse, a stand, laptop cleaning products, etc.
Retargeting. Since the pixel helps to track the users themselves and their actions on the site, if you see that some category of users entered the site, viewed products or services, but never bought anything, you can try to return them to the site using retargeting – display to the same user advertising your site.
For such users, you can make separate advertisements, which will contain some additional bonus for the purchase. For example, a discount, bonus points or cashback accrual.
Site analysis. With the help of a pixel, you will see the most visited pages of the site. For example, if your site has a blog, you will understand which materials are more interesting to users. If it turns out that some pages of your site or products are not popular, you can redesign the site structure to make these pages more accessible to the user.
How to customize Facebook pixel and pixel event
Pixel adjustment. To configure a pixel, go to Business Manager, then select the Events Manager section.
After that, you will need to fill out the form that opens, in which you will need to specify the name of the pixel and the url of the site. If you work with several sites, then enter a name by which you can understand for which site the pixel is configured. At the same time, given that Facebook pays attention to everything that you write in the Business Manager, including the name of the campaigns, if the site is about gray offers, it is better to indicate a neutral name.
After selecting the name and specifying the site address, another form will open in which you will need to select the method for installing the pixel. This can be done automatically using partner services tools (for example, Google Tag Manager, Magento, Segment, Shopify, Squarespace, Wix), or manually.
If you are not using partner services, select manual installation. In this case, a window will open in which the pixel code will be indicated. You will need to copy and paste it into your site.
If the site was created using a website constructor you can insert the pixel yourself. To do this, you will need to copy the pixel ID (not to be confused with the code) and paste it into the CRM system. Pixel ID can be found in Business manager -> Events Manager and select the desired pixel if there are several.
To check if a pixel is working open the Events Manager section in Business Manager, and if a green dot is lit opposite the selected pixel, it means that the pixel is working.
Setting up pixel events. However, setting the pixel alone is not enough. The fact is that initially, only tracking site traffic is sewn into the pixel. This information will not be enough to set up high-quality advertising.
That’s why Facebook has the ability to customize pixel events. There are about 40 events themselves. For example, these include adding an item to a cart or wishlist, registering on a site, searching a site, paid subscriptions, etc.
You can customize the pixel events in Facebook itself, manually in the site code or using partner services, for example, Google Tag Manager.
Since the setting and code will differ slightly depending on the selected event, you can go to Facebook for more detailed instructions on setting up a pixel.
A couple of weeks after the pixel is launched, you can start adjusting the audience to which the ad is displayed based on the collected data.
To do this, in Business Manager you need to go to the audience section, then click on the “Create audience” button and select the “Custom audience” item and click on the site button. After that, you can set up a new audience for the advertising campaign taking into account the data from the site.
There are lots of facilities that Gmail provides you so that you can use your Gmail account for your business effectively. Here are some of the features available for the users who use Gmail for business purpose:
1. First you must get a Gmail account with the help of Gmail apps on your domain. Your email Id will read like michelle@yourdomain.com. With the Gmail app you will get to use a host of applications such as Google docs, Google Calendar and many more which will then work on your domain. This is called customization of your email address which Gmail allows you to do so that you get a more professional look and are able to build your business identity.
2. You will be able to include the custom signature which will be added to the bottom of every mail. Every message will reflect your signature which will be inserted automatically, and you will be also able to add your title, phone number, address and even any great news about your company. All you need to do is go to the settings and in the accounts tab scroll down and add signature.
3. You can view multiple e-mail accounts through a single Gmail account. It is possible that you receive a lot of mails in different e-mail accounts. You can easily centralize the responses with the help of Gmail and keep track of all the mails easily. You have to make use of accounts and imports option available in settings and with the help of POP route all mails from other e-mail accounts to your Gmail account.
4. Gmail allows you to use another e-mail account as the sender while you use your primary Gmail account to send the message; this is called setting up a custom from address. You have to go to accounts and imports tab in settings and choose one of the addresses from which you want to reply while sending the e-mail.
5. Manage your inbox and make it clutter free with the help of Gmail the labels or folders. Make use of filters and set the criterion to transfer different mails to different folders according to their significance. This will help you to access mails you need from among thousands of other mails.
6. A feature called canned response is made available specially to reply to frequently asked questions. In a business, different clients may ask the same questions, to both clients and customers. With the help of canned responses, the responses can be saved by making use of this feature from Gmail Labs. You just have to compose a report or response one time and then send it to different recipients whenever the need arises.
It is not only the weak memory power that causes the loss of the password. One may take sufficient care to not forget the password, and still the loss of the password cannot be fully avoided. What can an email user do when the hackers hack the account and change the password? Well, there would be no other alternative but to recover the password. And, without the recovery email address or the phone number, it can be very much difficult to recover the password. It is not at all a difficult task to setup the recovery email address or the phone number. Neither is it difficult to change the recovery email. The Gmail users can follow the below quick steps to change the recovery email.
Steps for changing the recovery email
The following steps would enable the Gmail users change the recovery email quickly:
Launch Gmail and sign in to it on the computer by entering the username and password in the given space
Find the setting icon on the top right and click ‘Settings’
Scroll down the drop down menu and click ‘Accounts’
Click ‘Change password recovery options’ in the ‘Change account settings’ section (On clicking this, you will see the link for editing and then the prompted space for typing or entering the email address. Also you can find the space for entering the recovery phone number here.)
Enter or type the new recovery email address at the prompted space
Click ‘Save’
This would complete the process of changing the recovery email address. It is not at all a complex or difficult task. Also, it takes not more than a few minutes. Yes, the new or the amateur users may find the bit confusing if they have never done it before. But there is no need to worry as the step by step instructions are already there to guide the users.
Use of the recovery email
It is the recovery email that receives the password recovery code while using the troubleshooting link for password recovery. Without the recovery email or the phone number, the process of recovering the Gmail password can be very much cumbersome and hectic. With the help of the recovery email, the lost password can be recovered or reset in just a few seconds.
This will allow you to use Gmail offline that is when you are not connected to Internet. Through this feature you will be able to access Gmail account and use its various features when you are not connected to Internet. This is a very simple process which can be completed by any user and customers can enjoy the variety of features available in Gmail offline.
This is how you have to active each Gmail offline:
You have to log into your Gmail account by entering your correct username and password.
After that you have to go to Gmail settings.
There you will find the option Gmail offline.
In this section you will have to check the options which you want to use offline. In this manner Gmail of line will be activated for your account.
If you want you can also get Gmail offline for your employees and your personal domain. This feature is especially helpful if you use Gmail for your business.
With the help of Gmail off when feature you can send messages to your important clients while you are a very in holidays.
Have you ever tried to set the Google Calendar Goals? Really speaking, Google Calendar is not an unknown entity. Though, it has been long enough since the advent of the Google Calendar for Android, not all may really be able to reap its benefits. Some are unfamiliar with how to set and use it and some may not be aware of its benefits. In fact, the Google Calendar plays a vital role in regularizing the scheduling of daily, weekly, or monthly activities. Also, it is not all difficult to set Google Calendar for Android. If you learn using its features, it will surely be the best reminder as well as an assistant.
Simple steps to set and use Google Calendar for Android
Here are the few simple steps that can enable you set and use Google Calendar for Android:
• Go to the ‘Play Store’ on your Android device
• Find the Google Calendar App in the store
• Download and install it on your Android Device
• Find the red circle with a plus sign on the right hand corner of the bottom
• Tap the plus sign. Here you will see the options like Event, Reminder, and Goal etc.
• If you wish to set Goals, you need to tap on ‘Goal’. You will then find the further options like build a skill, and exercise etc. You can choose the option as per your choice and then set the time and frequency etc.
Not just a reminder
Many of the people may consider Google Calendar just a reminder or an alarm like thing. In fact, the experts have embellished it with such elegant features that it can be much than a mere reminder. Besides reminding you the important events or task, it also plays a vital role in assisting and guiding you to set goals and implement or achieve them. Truly speaking, it can be a real friend to regulate your life on the right track.
Automatic scheduling
If you have set a goal at a particular time but fail to act as per the goal, you can press ‘defer’ when you see the reminder. If some emergency arises and you fail to act as per the set goal and you schedule something else at that particular time, the Google Calendar for Android will automatically set the goal in the time slot that is free or available. You do not need to manually scroll and find the space for adjusting that goal. Also, you can easily and conveniently change, edit, or delete goals, events, and reminders etc just by tapping the right option.
It is known worldwide that Gmail is packed with highly elegant and user-friendly features. But the story does not come to an end here. The experts keep adding innovative and exciting features from time to time, and this escalates the excitement of the users to far greater heights. Have you ever tried to explore the customizing features of Gmail? If not, you may be missing a component of great excitement. Not only can you organize the email messages as per your desires and requirements by creating labels and adding folders, but the same time, you can also change the background themes and add professional ‘Signature’ to your account. If you have not yet started using the professional signature, you should surely learn and start using.
Simple steps to add signature in Gmail account
If you have not yet added your signature and wish to add a professional signature, you can follow the below step by step guide and add a signature as per your choice:
Open the web browser and launch Gmail
Enter the username and password to login to your account
Find the ‘Gear’ icon on the top right and click on it
Scroll down the drop down menu to find ‘Settings’
Click ‘Settings’ and scroll down until you find ‘Signature’
Type the name or the signature you wish to add to the account (Also, you can type and add designation or job title and the company name and contact number etc. You are free to add what you want. What you need is to just type whatever you wish to include with the signature.)
Choose the place where you wish to keep the signature by checking any of the options below the space you have typed the signature. (If you do not check any of the options, the signature may appear at the end of the text in the mail and this may not appear to be proper in every case. So choose the place where you wish the signature to appear.)
Click ‘Save’ once you have completed.
This completes the process of adding signature. Now you can see the signature when you compose the email messages and send them.
Adding signature to other linked email accounts
You can also add the same signature to other email accounts linked to your Gmail account. This will also take only a few seconds.
Gmail is one of the most popular free e-mail services in the world and has a large customer base. Over the years Gmail has improved its services to suit the needs and requirements of its customers and help them achieve more and communicate easily and has done a great deal in reducing the communication costs. The wonderful features of Gmail not only simplified the use of the e-mail account, but also it has a pleasing interface. Many features that have been first introduced by Gmail have been adopted by other email services to be in competition with Gmail.
Let us see while Gmail is best email services of all time:
Simplicity of use
Over the years Gmail has simplified the working of Gmail account by introducing simple yet innovative features. The option to create labels or folders is one of the best features of Gmail as it allows users to store the emails in a manner, so that it is easier for them to recover any mail whenever they want. The interface is simple and one can get their emails marked as important or starred or both and choose to see the mails which are important first.
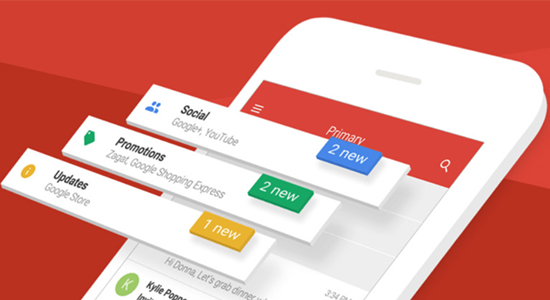
Organizing tools
One can streamline the entire inbox and arrange the thousands of mails into different categories. There is a category for marketing and promotional mails; there is a category for updates or mails from sources which you receive regularly. There is a category for social media notifications and there is category for primary or important mails. This really helps you to find out the most important mails that you want to check.
Then there is option to create filters which ensure that the mails reach directly to the folders you would want them to store. For example if you create a filter to get mails from your family to a particular folder, all mails will be directly transferred to the folder.
Instant and free communication
Option to make free voice calls and video calls makes Gmail a very cost effective and fast medium of communication. Just by opening a Gmail account one can make voice calls as well as video calls free of cost.
Storage space
When you open a Gmail account you can also access Google Drive. This option allows you to store any type of file. You can make use of Google drive to write a word document, create worksheets and do all those things which you do in Microsoft office. You can also make use of Google drive to send large files to a recipient through email.
Has there been a moment when you wasted a lot of time while scrolling through the junk of the email messages just to find one single important email message? It is certainly very much embarrassing at times. If you are not in a hurry, you may not instantly realize the issue. However, if you wish quickly find an urgent email message; you may surely not get disappointed. But there is nothing to worry. You can customize your email account to a great extent. Gmail offers great customizing features and you can use these features to escalate the luxury of using Gmail. Gmail offers the Filter feature and you can use this feature to organize the Gmail account in a convenient manner and enrich the user experience.
Simple steps to filter the Gmail messages
If you have never used the Gmail filtering features, you can learn to use these features using the steps given below:
Launch Gmail and login to your account by entering the username and password
Click the ‘Gear’ icon on the top right and scroll down to find ‘Settings’
Click ‘Settings’ and then find ‘Filters’ and click on it
Find and click the option ‘Create a new filter’
Choose and specify the criteria by ticking in the box given along with the alternatives provided
Once you specify the criteria, click ‘Test search’. This will provide you the result and you can see whether filter is functioning properly.
If you are satisfied with the created filter, click ‘Create filter with this search’
As per your choice and requirement, click Delete, or Mark as read etc.
Finally click ‘Create filter’
You can thus create filters as per your choice and requirements. You can choose and specify the criteria and filter all the emails. From now on, you will not have to scroll through each and every email message in the inbox. You know now which message is where and you can directly find that message without unnecessarily wasting any time in searching this.
Sometimes little things can make your life like a breeze. Recently the Gmail team from Google has rolled out six small tweaks to Gmail. These small features will certainly make using Gmail much pleasure able.
1. Auto Save Contacts Setting – Gmail automatically saves every email address you send messages to, so it can really help to recover forgotten addresses of your old friends or co workers and individuals you contacted once but you never felt to contact them again. However for some people this feature can be too much cluttered up with contacts. Hence from now on Gmail’s new setting will allow you to turn off the auto save option. You can find this feature on the General Tab of Gmail settings.
2. Warnings For Typos in Email Addresses – We make typos while sending email messages to a list of people. Sometimes while creating typos you may left out the “.” In your “.com”, Gmail will tell you there was an error but not point it out. But now, it will let you know which address has the problem helping you in sorting through a long “To:” list.
3. Reduced Annoying Pop-ups – Gmail’s organizes messages automatically, but sometimes those filters can become unwanted like sending mail that you had like to keep to the trash. When you replied the message in the Trash, Gmail would show error message and you have to click through to continue working. From now, you will still see the error, but it is no longer a pop up and it helps you to move the conversation out of the Trash right from there.
4. Easier Transitions Between Actions – You can create filters from the “Filter Messages like this” option that shows up on some messages. Now after you save your filter, Gmail will directly send you back to the message you were reading. Hence you can go right back what you were doing before.
5. Keyboard Shortcuts – Hitting shift+? will give you the keyboard shortcuts of various control present there. It is now automatically turned on and gives you a look into many other shortcuts.
6. Refresh Button – Now the inconsistency of “Refresh” as a link in the menu bar have been changed. It is now changed to a button to match.
If you enjoyed these features of Gmail and want to do online marketing with gmails then you can buy fresh Gmail accounts or Old Gmail accounts to make it easy.